
Do you know how to take screenshots on your Windows or Mac computer? Do you know how to take screenshots in Google Chrome and make annotations? You just have to press “print screen” in Windows to capture the browser screen. If you then want to take a screenshot on your MacOS or Windows computer, these two operating systems also make it easy for you.
But first, we will see several extensions in Chrome that will allow us to capture any content of our browser (and other programs in some cases).
In order to take screenshots in Google Chrome, you will need to download one of these two free extensions. And what if you don’t want to use an extension to capture the screen? Google Chrome includes by default a screenshot option that is somewhat hidden. I will tell you how to discover it.
How to take a screenshot in Google Chrome (Mac and Windows)
The first thing I’m going to tell you is how to take a screenshot on your Windows computer or on your Mac in a simple way with the options in Google Chrome.
1. Droplr
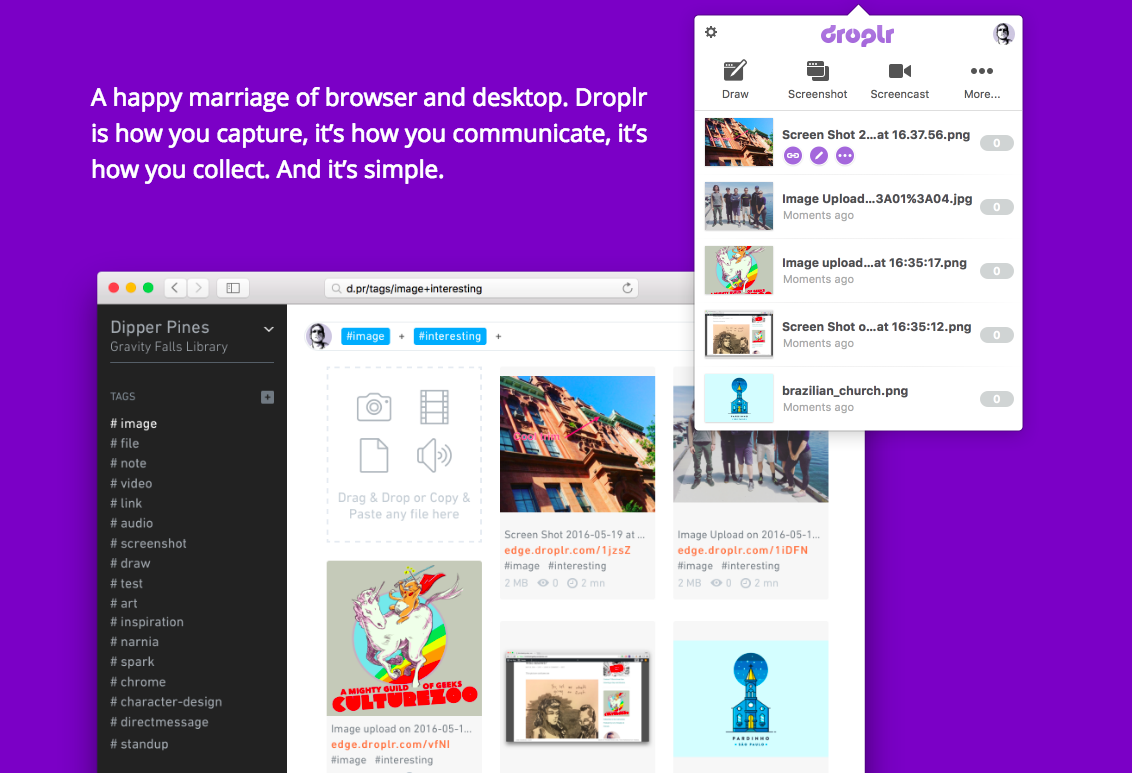
Droplr is a very complete tool that serves many things. The truth is that in a short time it has become the best way to share files, photos, notes, and links and also to do many other things in really simple steps such as recording screencast, taking screenshots, generating gifs or annotating photos.
It has an extension for Google Chrome, but also apps for Mac and Windows. You can annotate your capture.
Droplr has 2 price plans:
- Free: commercial use is not allowed, they give you 4GB of online storage, 2GB of file uploads and everything is deleted in 30 days (you can download the screenshots on your computer).
- Pro: Team of up to 25 members, 1TB of storage, brand account, file uploads of up to 10GB, app for Mac and Windows, password protection, and auto-destruction of files. Price: $2.99/month
2. Awesome Screenshot
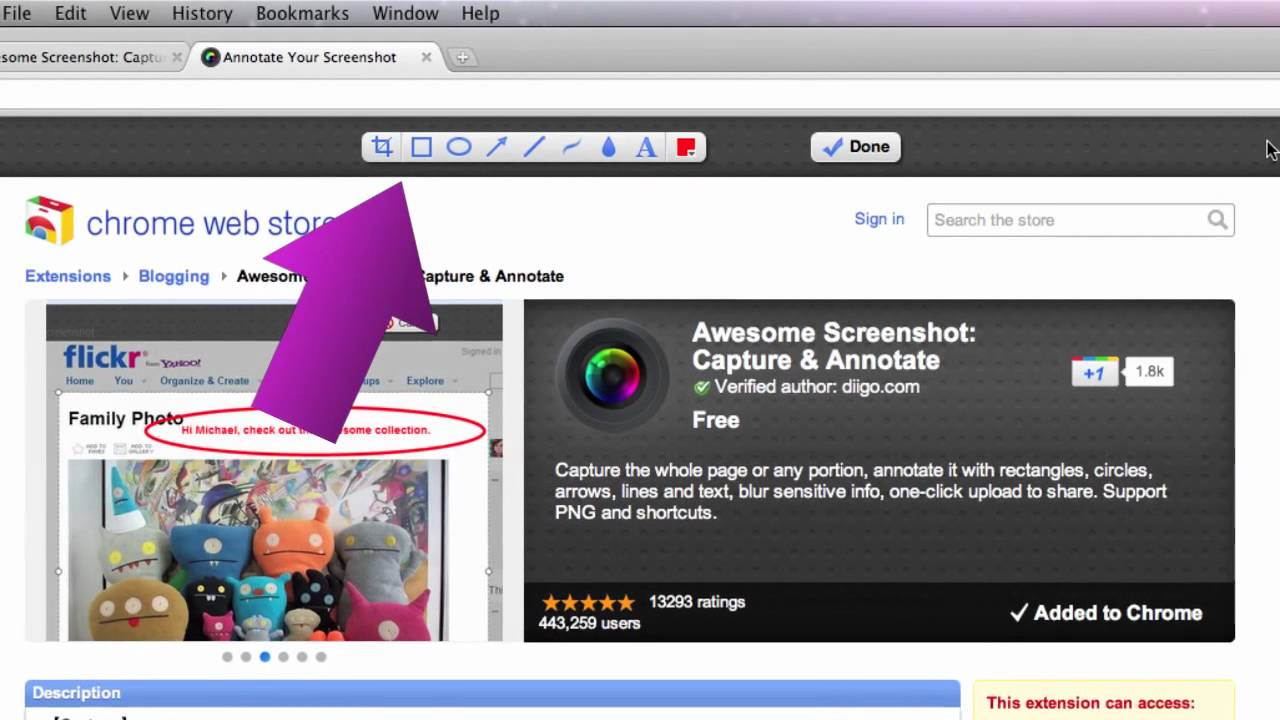
The extension is called “Awesome Screenshot”, and it has a lot of very interesting features (it is also available for Firefox).
We will be able to take screenshots of the visible area, of a selected area, of the entire page or of a specific image.
Once we have made the screenshot, we will be able to edit the image with very basic but very useful options:
We will be able to add text, boxes, arrows, and most importantly, we will be able to crop the image and save it in jpg or png format.
The images we save are usually not very large, especially if we choose the jpg format (for now only available for Windows, the option is not available on Mac).
The extension works quite well. Being “hung” on very few occasions. Totally recommended.
3. Full page capture – FireShot
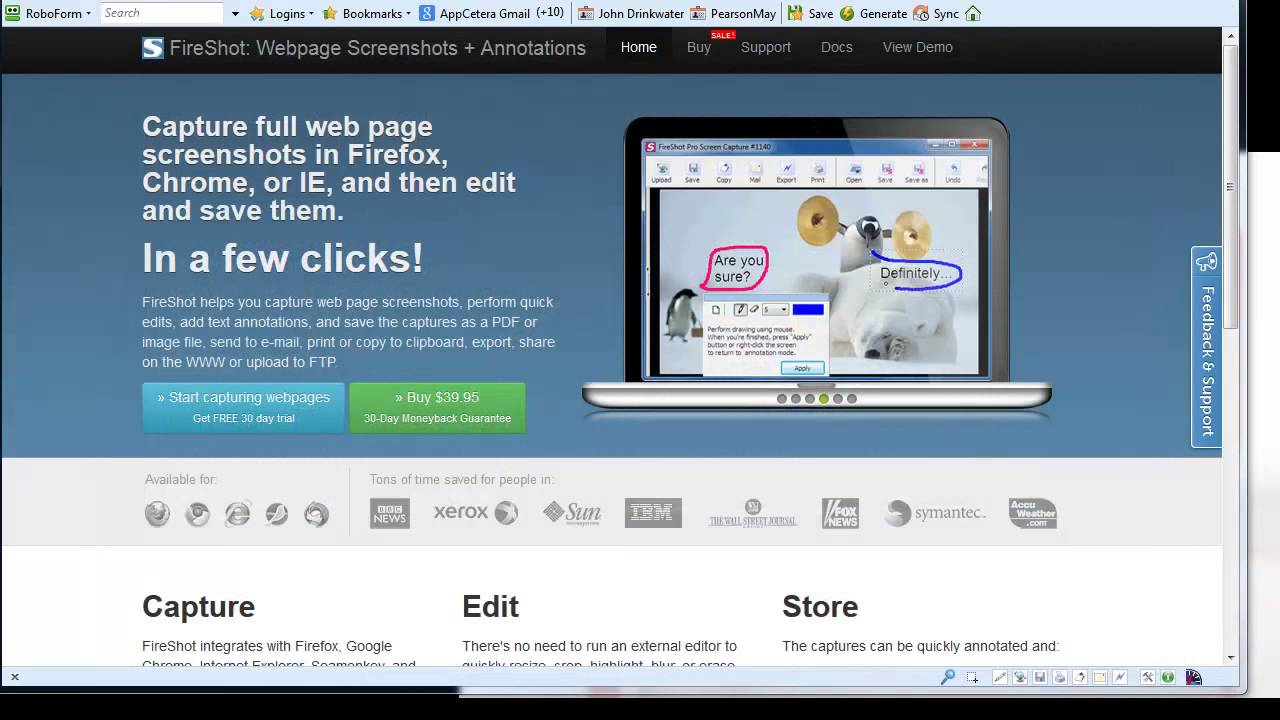
This is another highly recommended extension. Full page capture – FireShot. You have features very similar to the previous one, and you can also edit and annotate your screenshots.
It will allow us to capture web pages completely or only a part of the page that is visible and then copy the result to the clipboard or save the image in PDF, PNG or JPEG format. You will also be able to share the result on social networks or send the photo by email.
4. What if you don’t want to use an extension?
You can use the Google Chrome commands menu. Yes. Google Chrome includes by default a screenshot option that is somewhat hidden.
- The first thing you have to do is enter developer mode: You go to the 3-point menu at the top right, More tools> Developer tools.
- A panel will open. Then you just have to press the following key combination: Control + Shift + P on Windows and Linux or Command + Shift + P on Mac.
- You just have to start writing Screenshot so that the three available options appear.
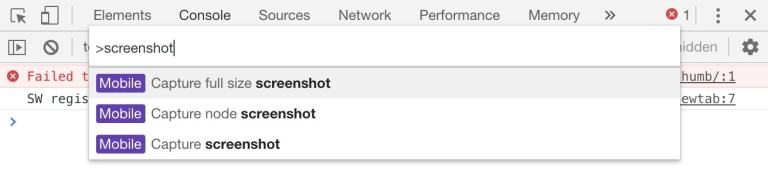
With the first option you will capture the full screen.
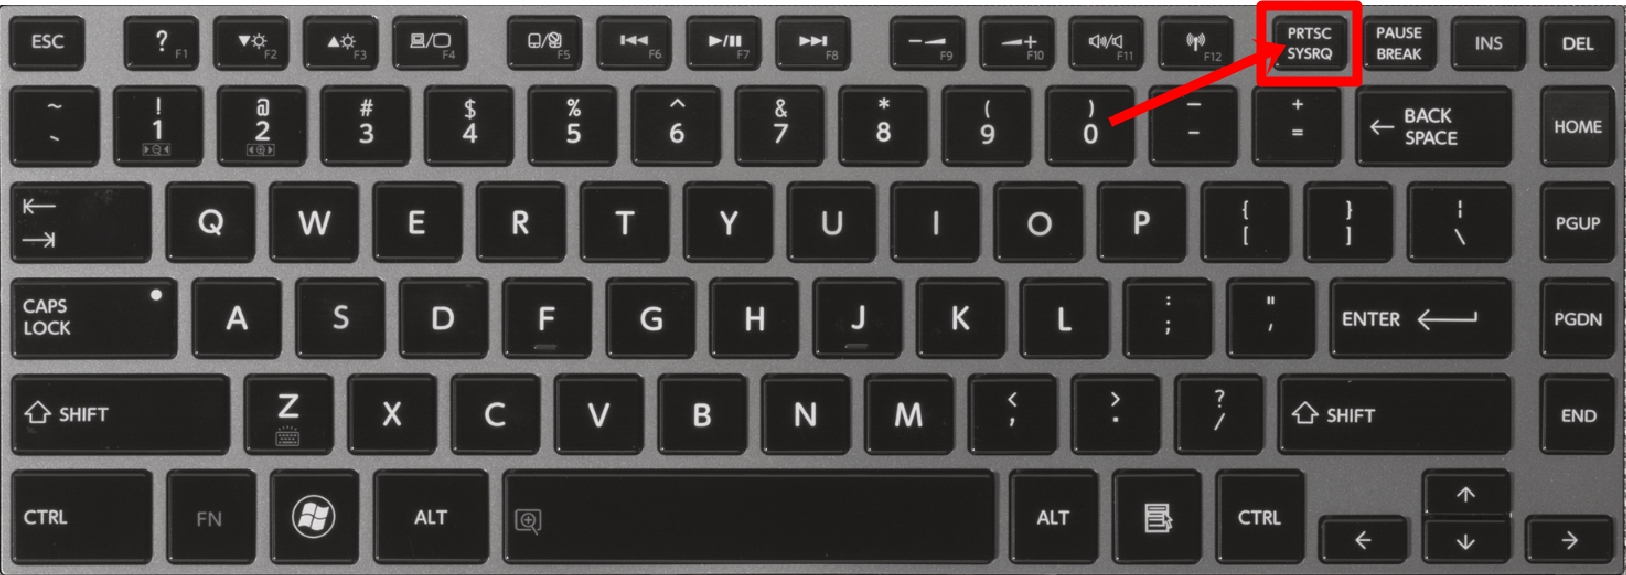
How to take a screenshot on Windows
Now I will tell you how to make a screenshot in Windows. It is really simple. You just have to find the “print screen” button on your computer keyboard (Print pant, PrtScrn, Print Screen). Normally it is in the row of “F” keys.
You have all the information at support.microsoft.com.
By touching that button, the image you have on your screen will be saved to the clipboard and from there you will have to go to an image editing program like Adobe Photoshop or Paint. Within the program, you just have to hit “paste” (Control+V keys).
You also have the option of using the “Clippings Tool” that we have in Windows 10: Select the Start button and then, in the search box on the taskbar, type clippings and select the Clippings Tool in the list of results.
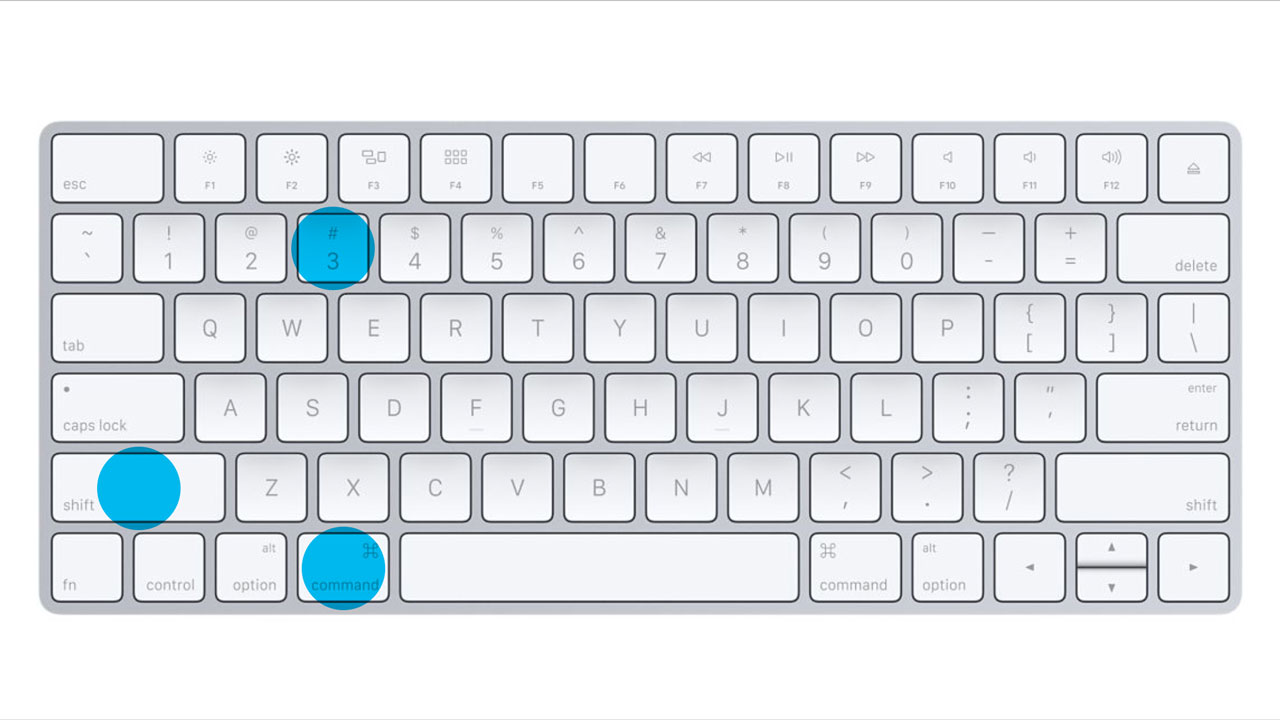
How to take a screenshot on Mac
On Mac and its MacOS system, the procedure is really simple.
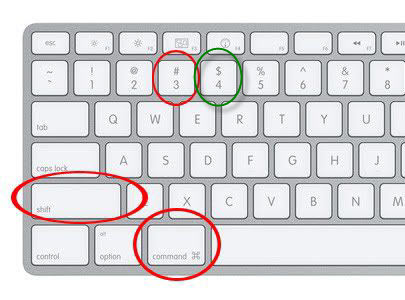
With the key combination Command (⌘) + Shift (⇧) + 3 we capture the entire Mac screen.
With the key combination Command (⌘) + Shift (⇧) + 4 we capture only a section of the Mac screen.


")


