In 2020, videos play an integral part in daily life. We watch videos on YouTube, DailyMotion, follow our favorite series on Netflix, and stay updated with the latest movie releases within a few clicks of a mouse.
It wouldn’t be an overstatement to mention that the need for video making and editing has gained traction, particularly over the last months in the context of the Coronavirus pandemic, affecting people from all walks of life. With many businesses partly or entirely shifting their activities online, videos have become of even greater importance in daily life. Journalists, teachers, entertainers, content creators, and folks belonging to a wide range of other occupational fields have acknowledged the importance of video recording. Is this the point where specialized software such as DemoCreator Screen Recorder comes into play. Wondershare came up with great software that filled the gap and introduced much-needed features in their software that makes it easy for everyone to create screen recordings and edit them afterward, according to their needs.
Choosing the right screen recorder for Windows 10 can be a challenge. You want software that’s easy to use, fast to set up, and efficient! Addressing amateurs and professionals alike, the latest version of DemoCreator Screen Recorder is the perfect balance between a software equipped with outstanding screen recording features and a wide array of tools that make video editing and publication easy.
Easily capture video in just a few clicks, and save the file in MP4, WMV, AVI, MOV, MP3 or GIF format. You can edit your footage for better clarity and to fit the goals of the video.
Installation
The installation process is very easy and straightforward.
Step 1
Go to the homepage and download the screen recording software
Step 2
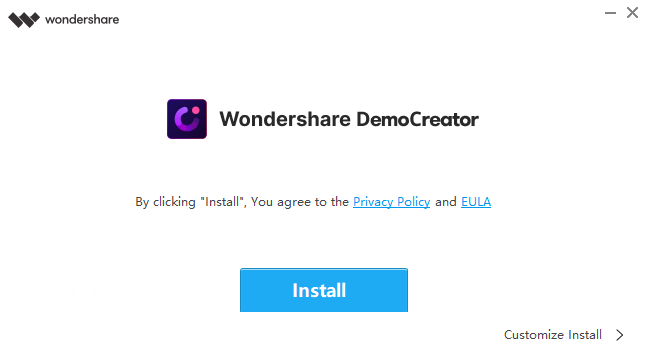
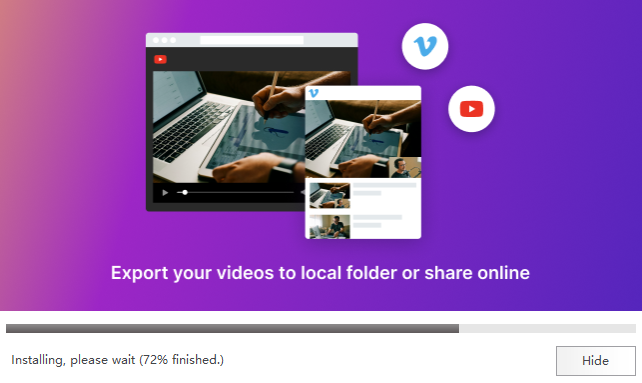
Follow the installation steps as shown in the screenshots below:
a.) Hit Install
b.) The installation begins
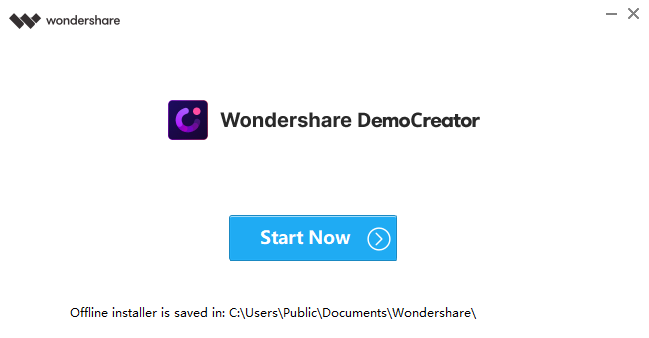
Step 3
Launch the software
Adjusting the Capture Settings
After installing the software, you can easily adjust the capture settings.
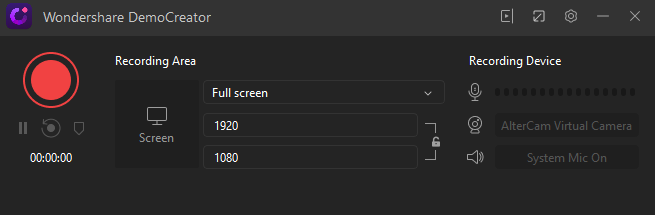
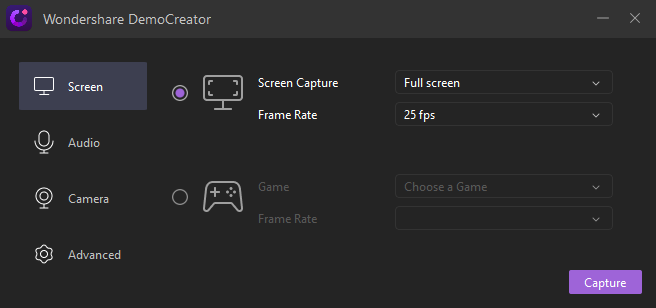
Screen – here you can set the screen recording area
- Choose whether to record your full screen, a customized region of your screen, or a specific target window
- Indicate whether you’ll be recording a game
- Choose your frame rate (from 15 to 120 fps)
Audio – Demo Creator screen recorder with audio allows making the microphone and computer audio settings for your recording

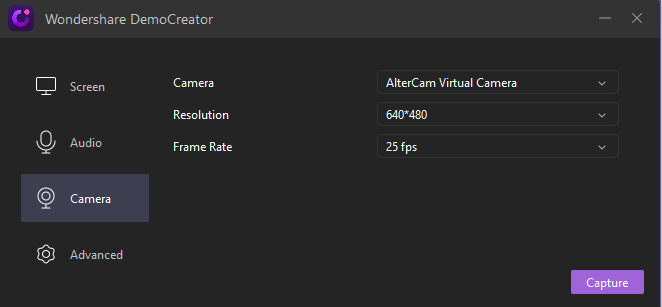
Camera – you can also use camera recording along with your presentation
- Choose your camera
- Choose the resolution you want to record
- Choose a frame rate for your camera recording
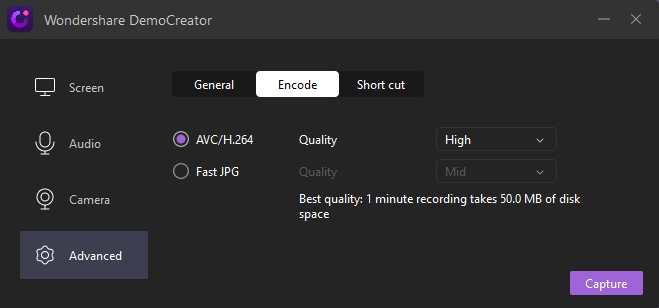
Advanced settings – you can change different recording settings such as the codec and more
- Choose where to save your files to
- Choose different encoder: AVC or FastJPG
- Set up hotkeys
Capture Screen Activity on Windows 10
Ready to begin recording? Click the red button in the menu. A short countdown will show on your screen, and then recording will begin. You can click Pause or Stop at any time. Alternatively, you can use F9 to pause or resume a recording, F10 to stop at any time.
After that, the editor will launch. Here you can edit the recording and add a wide array of animations, effects, stickers, and transitions.
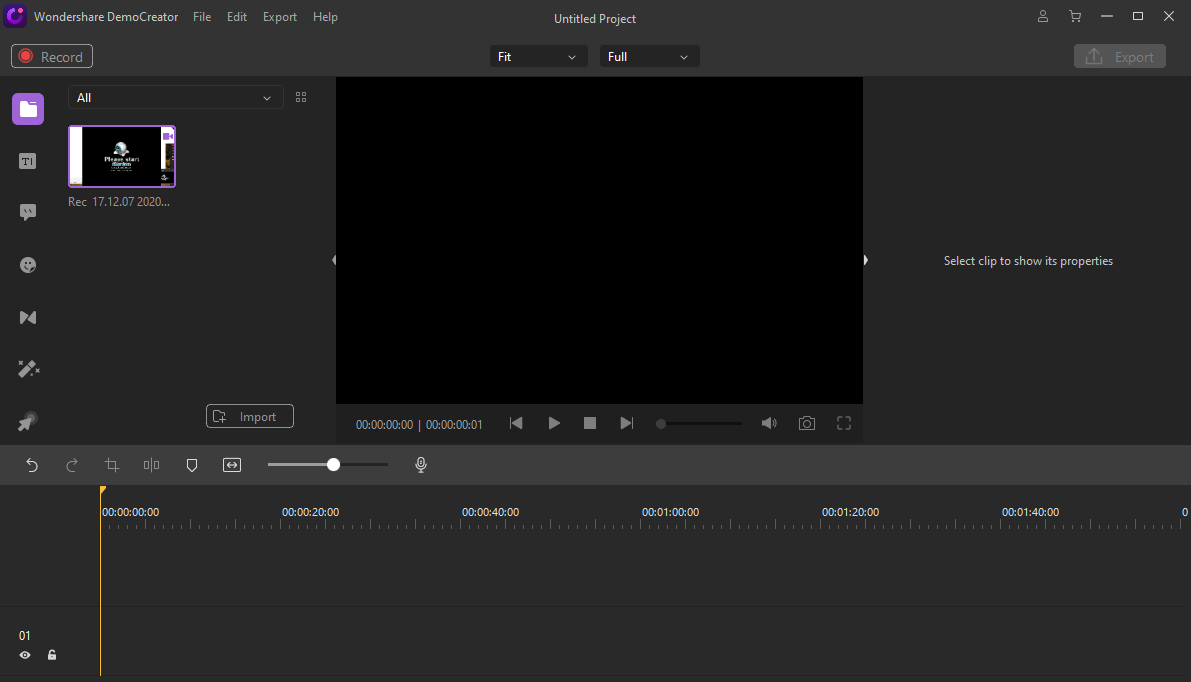
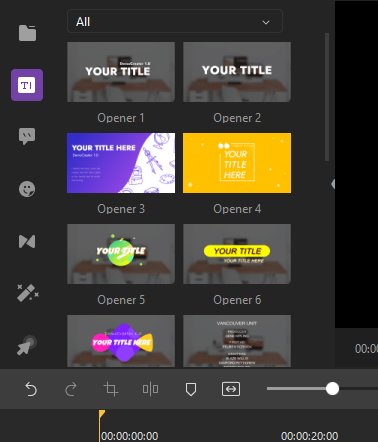
Captions – edit the title of the recording
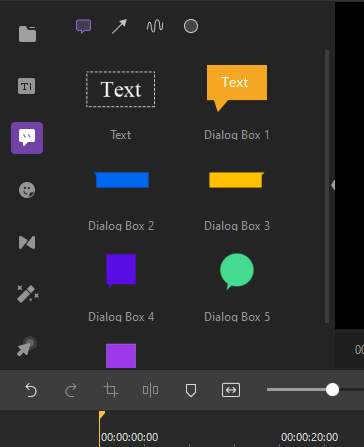
Annotations – insert small comments into the presentation
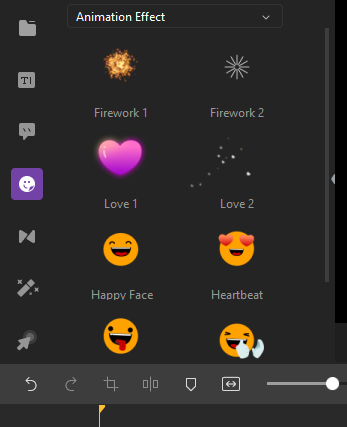
Animation effects – add stickers to your video
Transitions – add transition effects between scenes
![]()
Effects – add cool effects to the recording for a great user experience

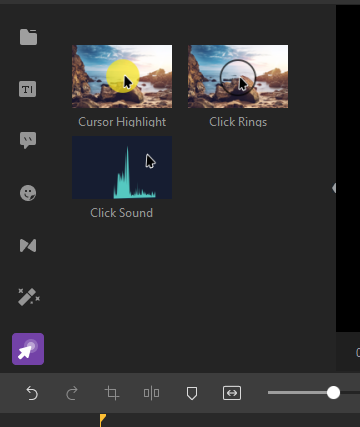
Cursors – change the shape and ty of the cursor pointer to make the presentation more appealing
Conclusion
Whether you’re sharing content with an internal team, updating a client, or preparing for a webinar, screen recording is a valuable tool. Choosing the right program to operate this process can save you time and headaches during the process. That’s why DemoCreator Screen Recorder for Windows 10 is the ideal option.


")


